Wednesday, August 25, 2010

Marshmallow Fondant

Now, before you wrinkle your nose and say "eeew" to yourself because I used the "f" word (fondant.... obviously)... keep an open mind and realize it's not the store bought stuff that comes in a foil bag. This is made with mini marshmallows. And really, who doesn't love mini marshmallows?

Let me just say that I wish I had the camera ready last night. Here's the scene: I'm in the kitchen at 11pm - just ran out of fondant and need a little more for an order that had to ship today. Not a big deal - I'll just whip some more up. Britt, the best helper ever... is approaching her bored/too tired to help stage, Erik is wiped from working his midnight tour - and I'm longing for a Friendly's sundae. Britt's helping make the fondant - and as I'm mixing in the confectioner's sugar, some insane subconscious thought runs through my mind and makes me use BOTH hands to grab the fondant out of the bowl and knead it. Well, that IS what you are supposed to do. EXCEPT... I forgot to put Crisco on my hands. So envision sticking both hands up to your wrists into 2 containers of Fluff.... now try to clean them off with no clean hands available. Thankfully, Britt helped free me up - and then was more than happy to escape to her room before I found something else for her to do that she clearly didn't want to do!!

Once I had the fondant all blended/kneaded, it was smooth sailing. Next time, when I have to make an entire batch of one color (like tomorrow when I make pink for a ladybug party order), I'm tinting the water and coloring the fondant BEFORE the sugar is mixed in.

Last night's project was monkey cupcake toppers for my friend Jessica.... they were being shipped south, so they were just the toppers. No cupcakes. Tonight I'll be making 100+ little lady bugs to prep for the party order this weekend. I love working with fondant - especially when Britt is home to help because her artistic ability to mold fascinating things is a HUGE help! (Read... she'll be making the lady bugs....).


Oh - this fondant is also perfect for rolling out and laying on cakes. It's soft and fluffy - and tastes delicious. Actually, I'm hoping to find time to make a special surprise for Natalie, my son's girlfriend -- who just came back from a Semester at Sea. Here's a rolled fondant cake I made my mom for Mother's Day. It looked much smoother in person than it does in the picture... promise!

Here's the recipe for the Marshmallow Fondant that I make:
  • 1 (16 ounce) package miniature marshmallows (I can only find 10.5oz, so I use a bag and a half for each batch)
  • 4 tablespoons water
  • 1 teaspoon vanilla extract (use clear if you want white fondant)
  • 2 pounds confectioners' sugar, divided (7 cups in the mix, 1 cup reserved for kneading)
Directions:
  1. Place the marshmallows in a large microwave-safe bowl, and microwave on High for 30 seconds to 1 minute to start melting the marshmallows. Carefully stir the water and vanilla extract into the hot marshmallows, and stir until the mixture is smooth. Slowly beat in the confectioners' sugar, a cup at a time, until you have a sticky dough. Reserve 1 cup of powdered sugar for kneading. The dough will be very stiff and VERY STICKY!!!
  2. Rub your hands thoroughly with Crisco (some people like a butter flavor and rub their hands with butter instead), and begin kneading the sticky dough. As you knead, the dough will become workable and pliable. Turn the dough out onto a working surface dusted with confectioners' sugar and continue kneading until the fondant is smooth and no longer sticky to the touch, 5 to 10 minutes.
  3. Form the fondant into a ball, wrap it tightly in plastic wrap, and refrigerate overnight. To use, allow the fondant to come to room temperature, and roll it out onto a flat surface dusted with confectioners' sugar. (**Note: Sometimes, like last night, I don't have time to let it sit overnight -- and haven't had a problem with using it right away)
I don't have many fondant pictures, but will take more this weekend of the ladybug cupcake order.... until then....
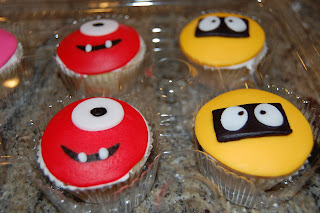
Some Yo Gabba Gabba cupcakes:
And this is Britt (modeling some flower cupcakes she made on Mother's Day)...

Monday, August 23, 2010

Make a Splash!

So you may remember in a previous post that I always use a pastry bag/tip to frost -- but on certain projects, that's just not possible. I had a party order last week for a friend's son's birthday pool/pizza party. She's a great mom - and planned a wonderful party for the kids. They had pizza makers come with their portable ovens and had each of the kids make their own pizzas. Great fun! It was also a pool party - and what better treat than cupcakes decorated in the theme! (of course!!).

So I made these..... vanilla cake with a vanilla butter cream infusion - topped with delicious butter cream frosting - and a cookie!! The cookies are decorated with an edible printed frosting sheet, attached to the cookie with royal icing and edged in sanding sugars.

It was also Matthew's daddy's birthday - so he was quite surprised to see a cookie for him, too! it totally made my week when my friend Roseann left me a 2-minute voice message on Monday telling me how everyone LOVED the cupcakes and how Matthew savors one each night after dinner. Nothing is more precious than a little boy with a blue tongue savoring his birthday sweets!!

Here's a close-up of the edible printed papers for the cookies...


Basic Buttercream Frosting... I've tried probably a dozen recipes for basic vanilla buttercream. They're all so similar - many just a little more of this or a little less of that. Here's the recipe for one that I don't find obnoxiously, overpoweringly sweet...

Ingredients:
2 sticks of butter, softened
3 1/2 cups confectioners sugar
1 tsp milk
1/2 tsp vanilla (I use a potent vanilla - if you use regular vanilla, increase to 1 tsp)

Cream butter, then add sugar one cup at a time. When combined, add milk and vanilla. If you like the frosting more fluffy, add a little more milk.


Thursday, August 19, 2010

Some of my Hello, Cupcake & What's New, Cupcake creations

As I mentioned in a previous post, I had the absolute pleasure of meeting Karen and Alan -- authors of the incredible Hello, Cupcake and What's New, Cupcake books. Those designs are soooo much fun to make - and they're not difficult at all. Most, if not all, of the ingredients are things you can find in your local supermarket or CVS. If you have the opportunity to take one of their workshops, DO IT!! I drove my sister, mom, and dear friend Kemely all the way to NJ near the PA border for this class!! It took us 3 hours to get there and 4 hours to get home, but worth every minute of our trip!! I'll have to dig out some photos from that class!

My absolute favorite design is in the What's New book... LoMein. It was so much fun to create that my daughter incorporated it into her birthday party this year. We had lots of teens over creating their own lomein cupcakes and t hey had a blast!! My local Chinese restaurant gave me these beautiful soup containers to use and the disposable chopsticks!


The popcorn was the first one I did - and they were time consuming, but looked amazing in the plastic boxes from Target's dollar spot! The spaghetti and meatballs was a breeze -- I've made them several times and was recently asked to make them as favors for an Italian-themed Sweet 16. For the "sauce", I don't like strawberry preserves, so I tinted some caramel with red coloring and rolled the "meatballs" in it. FYI - the meatballs are Ferrero Rocher candies. The "cheese" on top is grated white chocolate. I use a peanut butter butter cream frosting for the spaghetti so I don't have to "color" it.

The tv dinners were a HUGE hit! Slightly more difficult to make - but they really did come out great! The corn-on-the-cob were easy - but finding those shades of yellow/cream jelly belly jelly beans was a chore!


The koi fish is absolutely ADORABLE!!! And super easy to make using 2 circus peanuts, an apple jacks cereal and m&ms. The pies are really neat, too. If you use a muffin-sized cupcake, you'll really see the detailed m&ms look like cherries (or blueberries). Again, you can use peanut butter butter cream so you don't have to tint the frosting to the right "shade".


So now you see that cupcakes can be fun or classic, cute or sophisticated. If you love the creativity in the designs above, hurry up and buy both books!! You won't be disappointed!!

Monday, August 16, 2010

Raspberry Cream Cheese Cupcakes

Here they are... the cupcakes I said I will NEVER make again because they were so time consuming (compounded more so by the annoyance that the lemon juice mysteriously disappeared from the cabinet and Erik had to run to the store for more.... which is typical in this house.) I do have to say that these cupcakes disappeared at work quicker than the staff does when the boss goes home. But seriously, there was a line following me from my office to the "display area" where I usually put them out for everyone (read "the file cabinet in the secretary's area").

The cupcake is a white cake base, infused with a fresh raspberry filling, topped with a raspberry cream cheese frosting and garnished with a fresh raspberry. I don't eat fruit fillings, but everyone raved about these and my dear friend Jenn actually asked me to make her a cake like this for her birthday. My sweet hubby likes "healthier" cupcakes and loved these. So I guess I'll be making them again!

White cake: (if you opt to use a cake mix, use the egg white recipe and not the whole egg recipe. It does make a difference...) If you want to make the cake from scratch, I prefer Martha Stewart's Perfect White Cake mix... you can find the recipe here.

For the raspberry filling:
10 oz container of frozen raspberries (fresh frozen in sugar syrup)
1 TBSP water
3 TBSP sugar
1 tsp lemon juice
4 tsp cornstarch dissolved in 1/3 cup water

Filling instructions: Add water, sugar and lemon juice to the frozen raspberries in a small saucepan. On medium heat, cook them down until the raspberries start to fall apart. I think it took about 10 minutes or so. Once the raspberries start to fall apart, add 1 TBSP of the dissolved cornstarch and simmer for a few minutes. Remove from the stove and strain the raspberry mixture using a mesh strainer. Just when you think you've strained them completely, continue to press them against the strainer and you'll get more "puree" to come through. When completely strained, throw seeds away and put the strained mixture back on the stove. Add the rest of the dissolved cornstarch mixture and bring to a simmer. Remove from heat and cool completely. The mixture will thicken upon standing.

To fill the cupcakes, make sure the cupcakes are cooled. I used a pastry bag to infuse the cupcakes, but that was MESSY. You're better off using a squeeze bottle. (Yes, I have already purchased a bigger squeeze bottle for this filling for when I "never' make them again.) Fill your cupcakes until the filling starts to ooze from the top.

For the raspberry cream cheese frosting....
1 stick of salted butter (room temperature)
1 tsp clear vanilla
4 c confectioner's sugar
1 block of cream cheese (not softened) - cut into cubes (*use Philly... trust me)
a few tablespoons of the raspberry filling
Beat the butter and vanilla until blended. Add sugar one cup at a time, scraping the sides frequently. Whip in the cream cheese, a few cubes at a time. By adding the cream cheese cold (and not softened), the frosting will retain some of its stiffness. Do NOT overbeat -- just whip enough to blend the cream cheese. Then fold in the raspberry filling (don't overmix the filling in - just fold it in). Using a 1M tip, pipe the frosting onto the filled cupcakes and garnish with a fresh raspberry.

Thursday, August 12, 2010

Helpful Tips.... Using Buttermilk

I've picked up some tips or helpful hints throughout the years that I'd like to share with everyone. Some may be common sense, others may be just really good ideas. I'll feature tips every once in awhile and please, if you have one to share, email me or shoot me a comment!!

My first featured tip is about changing up a boxed cake mix...
I took a decorating class with the fabulous Karen Tack and Allan Richardson. If you have a passion for cupcakes, you'll recognize their names.... They're the authors of Hello, Cupcake and What's New, Cupcake. They can be found here. One of the most helpful hints I learned from them was to replace the water with buttermilk and add an extra egg when using a boxed mix. This will give the cupcake more density and make decorating/handling it easier.

So...
Use 1cup buttermilk in place of water (regardless of the amount called for)
Use the oil as directed
Use one extra egg (or eggwhite - depending on the recipe)

I almost always switch out my water with buttermilk. It doesn't affect the taste, whips the batter up more (yielding more cupcakes), and they definitely seem "sturdier".

**Note: I DO NOT change out the water for buttermilk when I'm using my Babycakes Cupcake Maker. I've decided that I prefer the non-buttermilk recipe for those.

Tuesday, August 10, 2010

The Essential Tools....

I believe that given the right tools, you can pretty much do anything. Well, almost anything. But you get what I mean, right? I have a large kitchen. A very large kitchen. No double oven. That is a huge sore spot for me, and a comment I probably drop to Erik at least weekly. In fact, just yesterday Erik and I were talking in the kitchen and I commented that someday I will not only have a double wall oven, but I will have a separate "baking kitchen". He gets scared when I start talking like that! So until then, I will just continue to bake here...

Tools. Ahhhh yes!! There are certain baking tools I have that I could not live without.
First let me just say that THIS PAN FREAKING ROCKS!!!!!It's not your standard mini-muffin pan. You know, the one ev
eryone has in their cabinet - that makes cupcakes the size of a Reese's. I searched high and low for a commercial pan that made ones "like Costco" -- one step up from mini (or "micro"), and one step down from standard. And I found it. At Williams & Sonoma. I was in my glory -- so much so that I asked Erik to buy me another one so I'd have two. And then they were discontinued. Seriously??? Just when I'm telling EVERYONE about this pan, they get discontinued? I called every W&S store around and nobody had one left. Finally, I was told they're getting new ones in - the updated model. All I have to say is I sure hope it's as perfect as this one!! I'll be sure to let you know when the new one is available. I check weekly. Ok, daily. but don't tell Erik because he already thinks I'm nuts.

And let me show you this baby.... literally "baby"... It's the Babycake
s Cupcake Maker. And OMG, who doesn't want a George Foreman-like grill for cupcakes??? With a power converter, you can even plug it into your car! My daughter bought this for me for my birthday last month. My ex did a great job shopping and helped her pick out the perfect gift! I cannot praise this baby enough. Cool, isn't it?
But wait.... the BEST part is it makes 8 cupcakes in FIVE MINUTES. Per
fectly shaped. Perfectly cooked. FIVE MINUTES FLAT. Unbelievable!! It also comes with a tool to make perfectly shaped pie crusts, plus a decorator bag and tips. You MUST get one of these. The booklet even says you can put crustless white bread in & make toast cups. Really? How cool would your kids think you are if you served them eggs in a toast cup!!! (Mine would think I've lost my mind....)Now, keep in mind that both of the "pans" above use a non-standard size baking cup. I found them online at www.wesellcoffee.com - for 500 @ $4. Yep - even cheaper than the micro ones in the stores! What's even better is that this "non-standard size" seems to be the "standard size" for mini cupcake clamshells, holders, etc. It's the size the stores use. PERFECT!!! Well, nearly perfect. My only issue is that they only come in white. So I sourced out some custom printed papers. (Of course I did....). You should have seen Erik's face when I told him the minimum order is 250,000 pcs.

Now for my favorite frosting tip.... Wilton's 1M (aka: 2110). The larg
e star tip. Every kitchen should come with one of these when you buy it. Well, every kitchen should also come with a double oven, too - but we know how that goes, right? I use either this tip or a large circle for the majority of my cupcakes. I will never frost another cupcake with a spatula. (Except for this weekend because I have to make "pool waves" on them.) Use this tip with a pastry bag (either reusable or disposable - whichever you prefer). I will post pictures soon showing you how to make a pretty swirl on top!
And finally, my clamshells.... Yes, we have hundreds of these at home. I think I get a box weekly of these. I have an unhealthy fear of running out of clamshells. Sort of like running out of toilet paper. And I just can't let that happen! Think about it, if you're bringing cupcakes to work or to school or to a friend, how many times have you put them on
a plate, stuck toothpicks in and covered it with foil. Yep. We've all done that. Then we go out and buy that nifty cupcake carrier. But the minute you give one of the kids the task of carrying it, you can kiss those pretty little cupcakes goodbye. When you go to the supermarket, you marvel at how awesome that little cupcake clamshell is, don't you? So did I. And then I searched. And searched some more. And then I found them. In every size. My favorite mini size. Standard size. Muffin size. Extra deep for cupcakes with lots of frosting. Holding 4, 6, or 12 cupcakes. I am in clamshell heaven! Wait -- I forgot to mention... they even have individual clamshells!! You can find them at www.wesellcoffee.com! Pure heaven!

Sunday, August 8, 2010

Peanut Butter Perfection

This is probably my most requested cupcake. Eyes light up when I walk into the dance studio holding a tray of these babies. I've even had friends order them by the dozen for their own birthdays with no intention of sharing. These are spectacular. You'll see!

Make your standard-size chocolate or devil's food cupcakes (though you may also consider using a muffin pan so you get a bigger cupcake because these are THAT good!!)

For the Peanut Butter Creme filling:
1/2 cup creamy peanut butter
3 TBSP unsalted butter, softened
1 1/2 cups confectioner's sugar
4 TBSP milk
Mix the peanut butter and butter together with an electric mixer. Add the sugar gradually. The mix will be crumbly. Add milk one TBSP at a time and beat on medium until fluffy.

Using a pastry bag with a large star/round tip, poke the tip through the top of the cupcake and squeeze the filling in. You'll feel it bulk up and when it starts to come out the top where the tip is, it's enough.

For the Peanut Butter Buttercream Icing (Wilton's):
Ingredients:
* 1/3 cup solid vegetable shortening (I use Crisco)
* 1/3 cup butter (I use salted)
* 3/4 cup peanut butter (sometimes I put in a full cup)
* 1 teaspoon pure vanilla extract (use a GOOD vanilla)
* 4 cups (approx. 1 lb.) confectioners' sugar, sifted
* 4-6 tablespoons milk (more milk = more of a whipped frosting)
Makes: About 3 cups

Instructions: Cream shortening and butter with electric mixer. Add peanut butter and vanilla. Gradually add sugar, one cup at a time, beating well on medium speed. Scrape sides and bottom of bowl often. When all sugar has been mixed in, icing will appear dry. Add milk, one tablespoon at a time, and beat at medium speed until light and fluffy.

Keep icing covered with a damp cloth until ready to use. For best results, keep icing bowl in refrigerator when not in use. Refrigerated in an airtight container, this icing can be stored 2 weeks. Re-whip before using.

I used a large star tip (Wiltons 1M) to pipe the icing on the cupcakes -- it goes very quick and looks professionally done. The picture above was NOT done using a 1M... when I make my next batch of PB, I will take some new pictures.

For toppings, I've used: micro chocolate chips, chocolate sprinkles, chopped Reese's, brown sanding sugar, etc. These were made using a 1M and shows some of the toppings I use. (Yes, I know these are vanilla cupcakes...)

Note: I will often use the peanut butter buttercream frosting as the filling. If you find it easier to make only one recipe, go ahead and use the buttercream for both.

Love & Cupcakes

Why start my blog today? What better day than 08/08? Today is my 2nd anniversary... I am married to the most amazing man, Erik. He'll be a guest blogger in no time! He's the frosting to my cupcake -- the one that brings the sparkle to my eyes, the warmth to my heart, and the confectioner's sugar to my cabinets. He's my "honey, I'm out of butter, can you please run and get me 10 lbs?". He's also my "babe, I need 200 cupcakes for an order tomorrow and I have to work late tonight, can you please...." and before I can finish my sentence, his reply is "how many of which flavors and what do you want me to make first?". He's better than ice cream. Hell, he's better than cupcakes! So my love of cupcakes and my sweet love share today! Happy Anniversary, Erik!

In the interest of time, I very often use boxed cake mixes and "change them up a bit". Don't be afraid to use a box mix -- but also don't hesitate to use one of your favorites from scratch with one of my frostings. Remember, you can NEVER go wrong with a cupcake!

What I hope for with this blog...
I hope that I can bring some fun into your kitchen (and bellies)
I hope that I can update at least weekly
I hope that you love my cupcakes so much that you eagerly await my next post
I hope that Bakerella visits my blog
And I hope that you come to love cupcakes as much as I do!

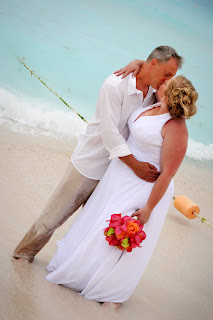
This is on our wedding day 2 years ago... 08/08/08

I know, I know.... all of the disclaimers/mushy stuff are out of the way now. Time to put on your apron and try my most requested cupcake.... Peanut Butter Perfection

Hello my friends....

Thanks for visiting my blog!

Just a little more about me.... I can be found in my kitchen at all hours of the night making dozens, or even hundreds, of cupcakes at a time. I’ve been known to whip up a few batches of frosting just to try them out — which, of course, leads to hundreds of cupcakes. My office, daughter’s dance studio and husband’s precinct benefit greatly from my cupcake obsession. I hope you do, too!

My goal is to post something at least weekly (let’s be honest, I have a full-time career, too – and 5 of our 6 kids living at home… life is a bit hectic!). I will start taking more (and better) pictures, so bear with me for a bit. In addition to yummy cupcakes to drool over and recipes to create your own, I'll have monthly giveaways, polls, and other fun stuff. Please leave me a comment if there’s something specific you’d like to see or if you have any questions.

I will be working on changing the design of this blog when time permits... It won't be this plain for long.